An Apple ID is your user name for everything you do with Apple from shopping on the iTunes Store and enabling iCloud on all your devices to buying from the Apple Online Store and accessing the Apple Support website.
So how do you create an Apple ID? We have detailed out the steps below.
Create an Apple ID on a computer
-
- Open iTunes on your computer. In case you don’t have iTunes, download it here and install it on your system.
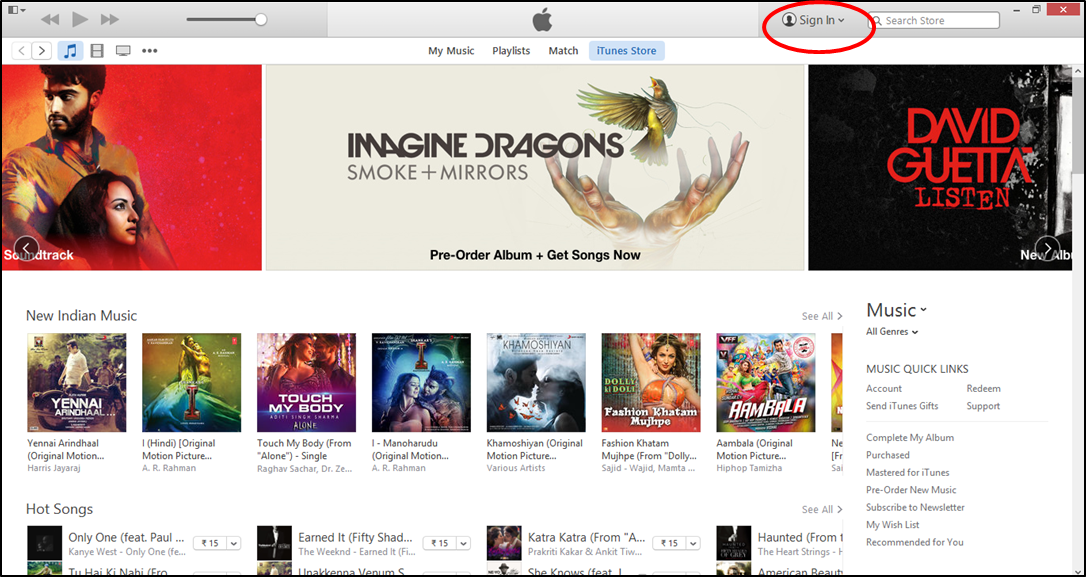
- Click on the ‘Sign-in’ option at the top right corner of iTunes.
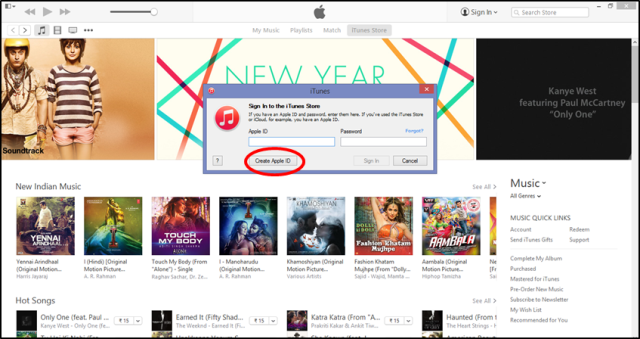
- Click on the ‘Create Apple ID’ option on the pop-up box that appears and then click on ‘Continue’.
-
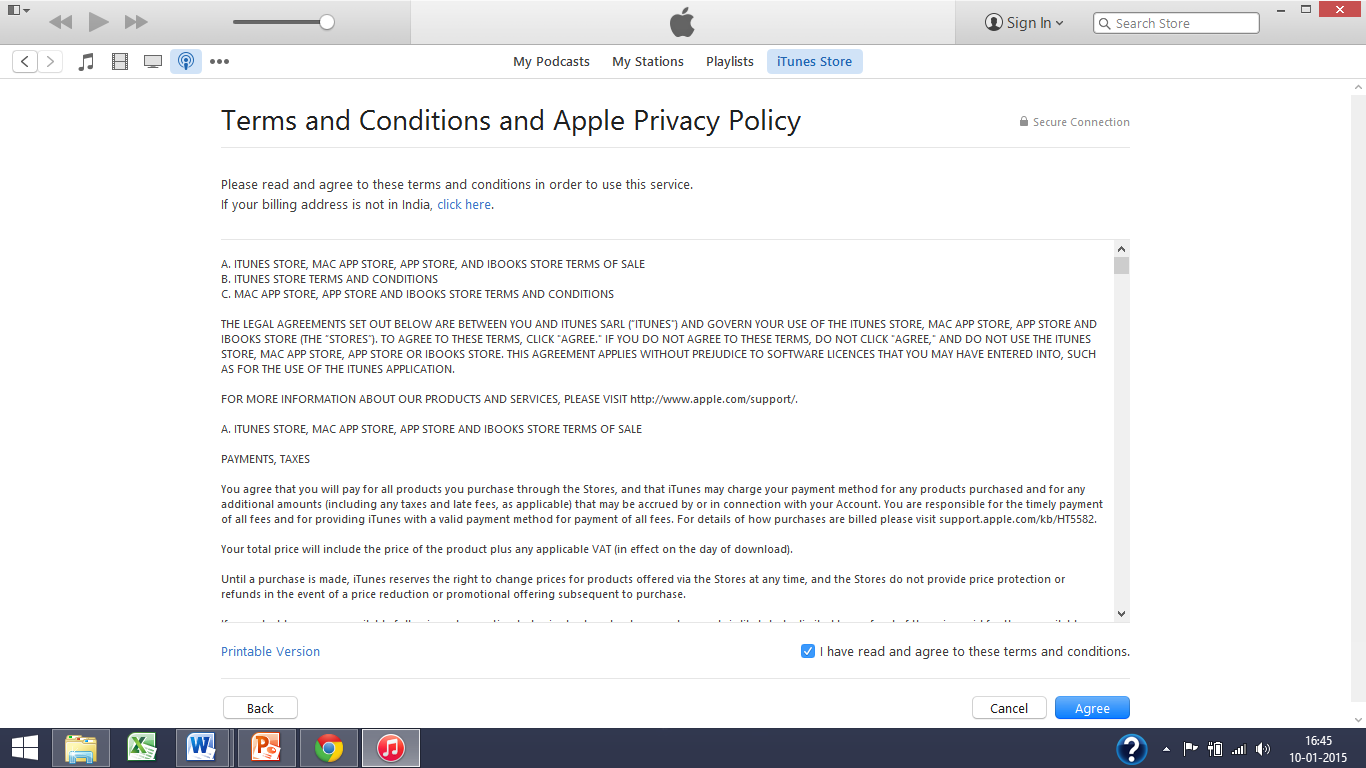
- Click on ‘Agree’ on the ‘Terms and Conditions and Apple Privacy Policy’ page.
-
-
Fill up the form on the next page. It includes three security questions and even requests for an optional rescue email address. We highly recommend providing this email address as it might prove to be very useful for you in the future.
-

- Click on ‘Continue’ after you’ve filled in all the required details. If you see a message alert that says ‘the email address you entered is already being used for an Apple account’, click here and follow the instructions on using an existing Apple ID.
-
Fill in your billing information on the next page and click on ‘Continue’.
- A verification mail will now be sent your registered email address. Click on the verification link provided in the mail.
- Now enter your Apple ID credentials and click on the ‘Verify Address’ button.
Voila! You’re done.
Create an Apple ID on your Apple device (iPhone, iPad, or iPod touch)
-
-
- Click on the ‘Settings’ icon on the home screen and scroll down to ’iTunes & App Store’.
- Select the ‘Create New Apple ID’ option.
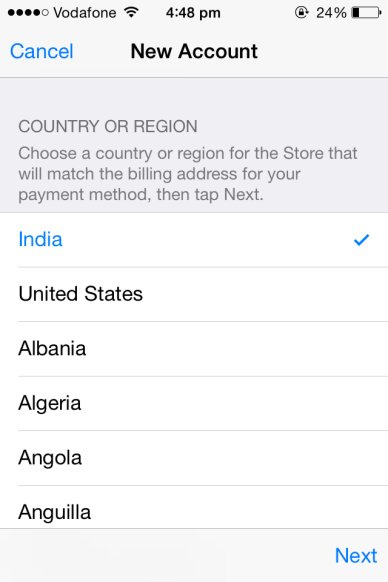
- Select the country you’re located in and click on ‘Next’.
-
-
-
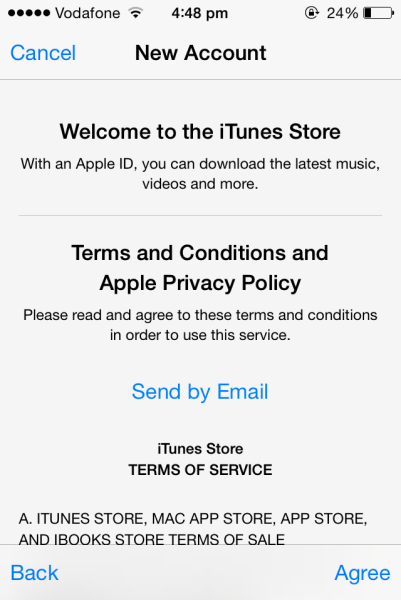
Select ‘Agree’ on the ‘Terms and Conditions and Apple Privacy Policy’ page.
-
-
-
On the next page, provide an email address (this will be your Apple ID), your password, three security questions and a rescue email address. We highly recommend providing this email address as it might prove to be very useful for you in the future.

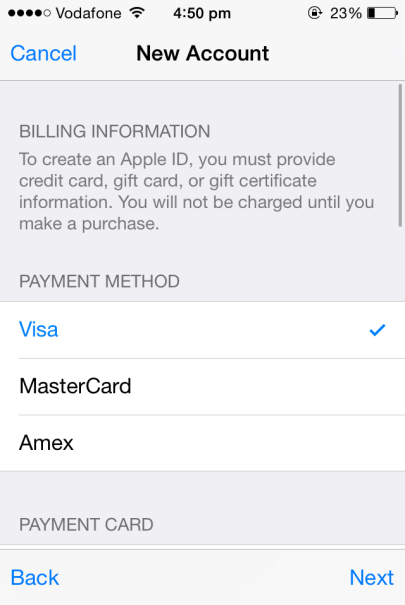
- Fill in your billing information on the next page and select ‘Next’.
-

- Tap ‘Done’ on the ‘Verify your account’ screen.
- A verification mail will now be sent your registered email address. Tap on the verification link provided in the mail.
- Now enter your Apple ID credentials and select the ‘Verify Address’ button.
You’re done!
If you want to edit account information such as your Apple ID, payment information or your billing address, select your account name at the bottom of the page once you’re signed in to the iTunes Store. Select ‘View Account’ on the next pop-up screen and make the changes. You might be asked to enter your account password again for verification.
Have anything to add to this article? Let us know via comments.
iService is the top rated apple service center in Bangalore. We have a team of expert technicians who can resolve almost any Apple device issues ranging from simple iphone services such as fixing locked phones to daunting mac services such as reviving dead macs. If you face any issues with your Apple device, call us at +91 7411811911 or select your faulty device here so that we can get in touch with you.